Is your dream kitchen calling for a powerful new electric range? Installing or replacing an electric stove calls for specific circuits and connections to handle the load. Lucky for you, we have the perfect step-by-step guide to wiring 220V electric cookers.
Learn how to do it right and safely.
And note: Always consult a professional electrician for any work on major appliances and circuitry. Safety should be the top priority when dealing with high-voltage hookups. Never attempt electrical work unless you’re positive you have the experience and knowledge to do so safely.
Wiring an Electric Cooker – Step-by-Step Guide
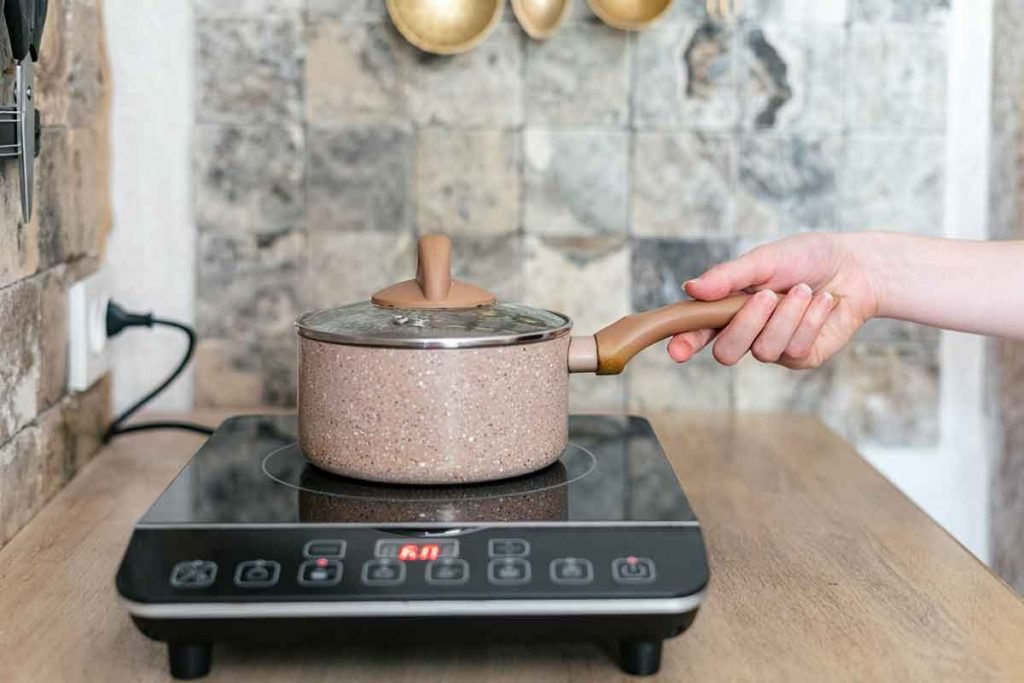
Installing an electric cooker is no different from installing an induction cooker. Follow these key steps to properly and safely wire your new electric stove:
Step 1: Select Installation Location
Choose a permanent location for installing the electric range, such as a slide-in next to kitchen cabinets. Measure the cutout space in cabinets or countertops to ensure the cooktop will fit properly. Check required clearance distances from walls, cabinets, and vent hoods per manufacturer guidelines
Step 2: Shut Off Home Main Circuit Breaker
Find the main circuit breaker panel and shut off all power to the home. Double-check by turning on lamps, appliances, etc. to confirm the electricity is off. This protects you from shock while working
Step 3: Remove Old Electric Cooktop if You’re Replacing
Unplug the old electric cooktop if there is an accessible outlet, and then disconnect and label existing wiring connections on the appliance. Unfasten any mounting brackets or screws and safely remove the old cooktop. You may also want to cap any exposed wires using wire nuts to avoid hazards
Step 4: Run Wiring to Junction Box
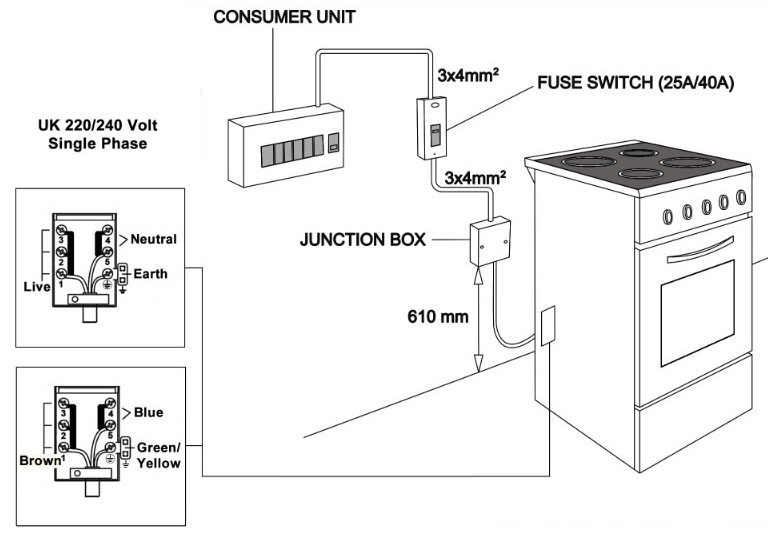
Run 10/3 NM armored cable from the circuit breaker panel to the cooktop’s junction box. Use cable clamps and staples to securely fasten the cable along the run. Ensure you have 4-5 feet of extra wire at the junction box for connections
Step 5: Connect Wiring to Junction Box
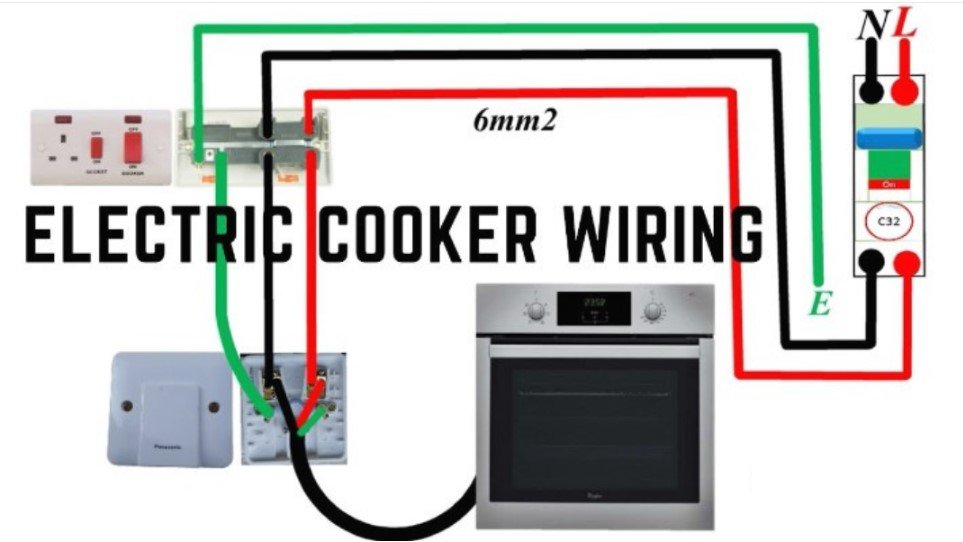
Remove the junction box cover and feed wires inside. Now, attach hot, neutral, and ground wires securely to junction box terminals. Verify ground wire is properly grounded to the metal junction box
Step 6: Install 50 Amp Double-Pole Circuit Breaker
Select an unused 50A Double-Pole Breaker in the main panel. Connect the hot and neutral wires from the junction box to the breaker. Ensure the breaker is properly seated and secured in the panel.
Step 7: Connect Wiring to Cooktop
Attach junction box wires to the corresponding cooktop terminals. Check with the appliance wiring diagram to confirm connections. Secure Live, neutral, ground, and any control wires properly
Step 8: Test Cooktop Operation
At this point, most of the wiring job is done. Restore power at the main breaker panel and verify power to the cooktop. Turn on the cooktop elements and check the heat. If there are any issues, address them first before completing the installation process.
Step 9: Mount and Finish Installation
With a successful operation test, slide the cooktop into the cabinet cutout. Securely fasten the cooktop into place per the manufacturer’s instructions. Replace cover panels or countertops around the newly wired cooktop
And you’re done!
Electric Range or Stove Wiring Diagram

In More details:

What Wire Do I Need for a 220V Range?
Just like induction cooktops electrical requirements, most modern electric ranges require a 220-240 volt circuit. This means you’ll need thick 10/3 gauge wire rated for that voltage and a 50 amp connection.
10-gauge wire provides sufficient thickness for power safely. The 10/3 refers to 10 AWG gauge wire with black, red, white (3) internal wires:
Wire Color Codes
| Wire Color | Function |
|---|---|
| Black | Hot 1 |
| Red | Hot 2 |
| White | Neutral |
| Bare Copper | Ground |
This 4-wire hookup gives you two 120V “hot” wires to make 220V current for your stove. Don’t use standard 15-amp household wire, which would overheat and become a fire hazard.
As for sizing, consider the following:
Copper Wire for Electric Cookers and Stoves
| Amp Rating | Wire Size (AWG) |
|---|---|
| 20 Amp | 12 AWG |
| 30 Amp | 10 AWG |
| 40 Amp | 8 AWG |
| 50 Amp | 6 AWG |
| 60 Amp | 4 AWG |
Aluminum Wire for Electric Cookers and Stoves
| Amp Rating | Wire Size (AWG) |
|---|---|
| 20 Amp | 10 AWG |
| 30 Amp | 8 AWG |
| 40 Amp | 6 AWG |
| 50 Amp | 4 AWG |
| 60 Amp | 2 AWG |
NEC Codes for Electric Cooktop Wiring
There are key regulations per the National Electrical Code (NEC) for proper and safe electric range wiring:
- Dedicated circuit – No other appliances shared on the same wires.
- Correct wire gauge – 10 AWG for 220V electric range connection.
- Double-pole breaker – 50-amp, 220V dual breaker for hot and neutral.
- GFCI protected – Cooktop circuit must have ground-fault protection.
- 4-wire connection – Separate hot, hot, neutral, and ground.
- Junction box – Must have covered access near the cooktop.
Always have work inspected by your local building department to ensure NEC and local codes are followed. Don’t cut corners when it comes to electrical safety!
Key Takeaways
Now you just need to shop for that dream cooker before inviting an electrician to do their wiring. While these steps are not necessarily beginner DIY work, arming yourself with the right knowledge ensures the job gets done both safely and correctly.
Common Questions
What gauge wire is needed for wiring an electric stove?
10 AWG wire is typically required for the 220-240V electric range connection. This thick gauge safely handles the electrical load.
Does an electric stove need a dedicated circuit?
Yes, electric ranges should have a dedicated circuit breaker and wiring that is not shared by other appliances, according to NEC code.
What size breaker is required for a 220V electric stove?
A 50-amp double-pole breaker is the correct size circuit breaker to safely handle the current for most 220V electric ranges.
Can I use the existing 3-wire connection for a new electric range?
No, it’s recommended to upgrade to a dedicated 4-wire connection and 50-amp breaker to meet safety codes and power requirements.


